FAUX SHIPLAP WALL

Who doesn’t love a good modern farmhouse shiplap wall?! I have been wanting one in my studio/office space forever but wasn’t sure I wanted to fully commit to real shiplap that could damage our brand new walls. So I figured why not try painting it to look like shiplap, that way if I ever get tired of it it’s an easy fix by just repainting the wall. It was a little bit of trial and error but I am loving the way it turned out!
First I painted the wall with some left over “white” paint that I had laying around. After 2 coats I realized it had a very light gray undertone to it, especially next to our bright white trim. I was already thinking this was going to be a fail but figured I might as well continue and see what it would look like in the end.
Next I measured out each “board”, I decided to do 6 inch boards. I knew my desk would be against this wall so decided to start measuring from the ceiling down, that way if I have a board that was a little bigger or smaller than the 6 inches it would be at the bottom where it wouldn’t be seen as much.
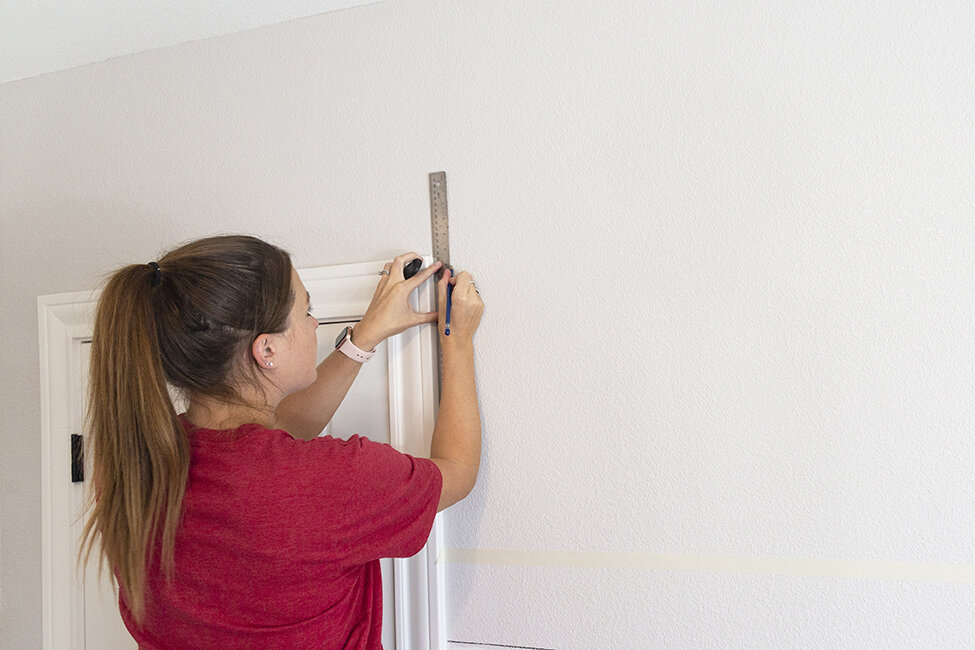
After getting the wall measured out I used painters tape to tape off each of the lines. Then using a ruler (or you could use a level) and a black paint pen I went in and drew each of the lines to create the “boards”. I used these paint pens from Michaels, but after doing some research, I would suggest either using Sharpie Oil Based paint pens or Decocolor Paint Pens, the lines will come out much cleaner.


I still wasn’t loving the color of my shiplap since it was bright white like I was hoping so I got white paint from Lowes (it was not mixed, just the paint right of the shelf). Using an angled paint brush I went in and added the white on top of the grayish-white using a mixture of a dry brush and wet brush technique. Doing this, created a texture which gave it a more vintage shiplap look!
When painting don’t be afraid to get paint on the black lines, this will help create a more realistic look. It’s best to start lightly and you can always go back in and add more paint on top to make it more white. Make sure you step back occasionally as you’re painting to see the wall all together, this will also help you see where you might need to add more white paint at.
Wet brush technique: dip your paint brush in the paint and wipe most of it, then with a spray bottle spray water onto the brush and apply to wall.

Dry brush technique: dip your paint brush in the paint and wipe most of it off, go back in top of your paint and paint streaks (making it a little more white in certain areas). Continue to go over the same area to blend it in so its not a harsh line.

All in all, I love the way it turned out!
